- Ceramics
- Artist Pages
- Asian Ceramics & Tea
- Ceramics Artist Links
- Ceramics Links
- Ceramics Terms Glossary
- Agateware
- Banding Wheel
- Bat, Throwing Bat
- Bisqueware, Biscuit Ware
- Blistering
- Blow Up
- Boat Anchor
- Calipers
- Carbon Coring, Black Coring
- Carbon Trap
- Chuck, Chum
- Coil
- Colorants
- Crazing
- Downdraft Kiln
- EPK, Edgar Plastic Kaolin
- Electric Kiln
- Extrusion, Extruder
- Fettle, Fettling Knife
- Force Dry
- Greenware
- Kaolinite
- Kilnsitter
- Overglaze
- Pinholing
- Plucking
- Pug Mill
- Pyrometric Cones
- Raku
- Rib
- Sgraffito
- Shelf Of Shame
- Slab Roller
- Slip
- Test Tile
- Knowledge
- Frequently Ignored Answers
- Photography
- Photographers
- Photo Links
- Raw File Converters
- Camera Simulators
- Color Vision Games
- Frequently Ignored Answers
- Resources
- Contact

The Two Rules Of Joining Clay
1. The Wetter The Better (The wetter the clay is, the easier it is to join.)
2. Join Like To Like (The pieces being joined should be the same dampness.)
Why These Rules?
Sam Scott at Shoreline Community College is the potter who stated these rules to me in this simple, memorable form. Here's my shot at an explanation for them.
1. The wetter the better: The more water between the clay particles, the more they can slide around and intermingle when clay pieces are next to each other, and the more soft and plastic the clay is, making it easier to physically blend clay pieces into one another.
2. Join like to like: When joining clay parts together, they should be equally wet (have the same moisture content). As clay dries it shrinks - physical water between the clay particles evaporates, and the clay particles draw nearer to each other. If a wet clay piece is joined to a drier clay piece, the wet clay piece has more shrinking left to do than the drier piece, and so (as it does shrink more) it will create stress and want to crack away from the drier piece. Unknowing, forgetful or pig-headed beginners may be able to join a wet piece of clay to a near bone-dry piece (typically something they have been working on for days and have let dry out too much), but in the end, no matter what they do, the wet clay will shrink more than the drier clay and all their effort will usually go for naught. The simple solution is to spend a little effort before attaching things to re-wet the drier piece, and/or dry out the wetter piece, until the parts are evenly wet, then join them. Paying attention to this rule will make working with clay 100% less frustrating.
(If you are already at the frustrated dry and broken stage, skip down to the bottom for alternative solutions for pieces worthy of saving - just remember to follow good technique to minimize future frustration. Don't say I didn't try to make your life easier . . . )
Marrying Clay
Soft wet clay pieces, such as clay coils used in pot-making, can be joined by physically blending the pieces together, smashing and combining them into each other at the join. Beginner mistake: if pieces of wet clay are simply set on top of each other or lightly pressed together they will stick to each other at first, but as the clay dries they will fall apart; pieces need to be firmly smeared together or scored and slipped (see below) in order to stay attached when fired in a kiln.
Scoring and slipping.
Clay pieces that are drier and harder, or that you want to join together without blending or altering their forms, traditionally must be scored and slipped (or slipped and scored). In this process slip, a liquid mixture of clay and water, is used to help weld the pieces together. (Sometimes, instead of slip, only water (or spit) is used, or some special formula (see below). Until you experiment and know what works for you, slipping and scoring is pretty fail-safe if done correctly.)
- Mark where the pieces are to be joined to each other.
- Using a serrated scraper (my favorite), fork, pin tool, knife, or other sharp tool, score grooves into the clay. Cross-hatch the grooves and make them deeper than just very light surface scratches.
- Spread slip over the scored areas using a knife, a brush, your finger, etc. Make sure to fill in all the grooves so you create no air pockets. Some potters reverse this process, putting slip on first then scoring through it, thereby cutting the slip into the clay as they do.
- If the clay is on the drier side of leather hard, score and slip the areas again to really work in the slip and make the pieces sticky.
- After both pieces are slipped and scored, you might wish to let them sit a moment or two until the wet sheen of the slip dulls down. This will make them more sticky and less slippery when you push things together.
- When you're ready, firmly press the pieces together. If possible, tap down on one piece above the join or wriggle it a tiny bit as you push it on to help seat it and get rid of any air pockets.
- Always check to make sure things are lined up the way you want them - you've got just a few moments to correct things. If you're joining multiple pieces together, as in a slab vessel, make sure the piece you just attached hasn't thrown off the pieces attached earlier.
- Wipe away excess slip, clean off fingerprints, and continue joining pieces, if needed. When finished, the joined areas will be wetter than the rest of the piece; to even out the moisture, wrap the piece in plastic and let it sit for awhile before you continue working.
- For the insides of slab vessels, when the joins are firm, it can be a nice touch to roll a thin coil of clay and press it into the inside corners of the joins to make them more attractive and to help them stay together.
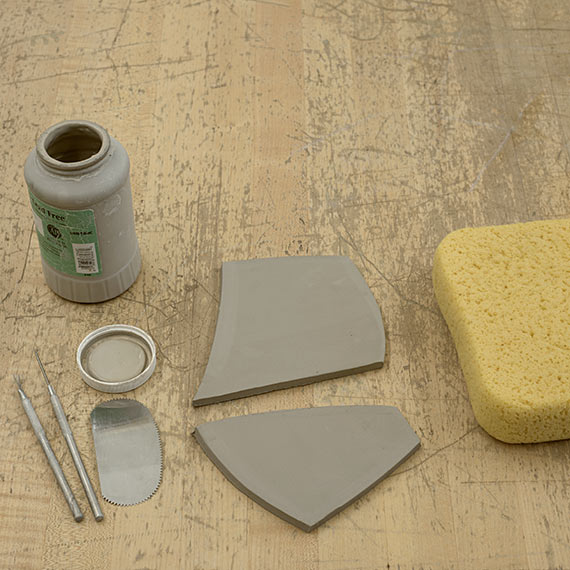
Gathered supplies to join two random soft slabs of clay. I usually have a large damp sponge handy that I can wipe my hands and tools on to clean them as I work.
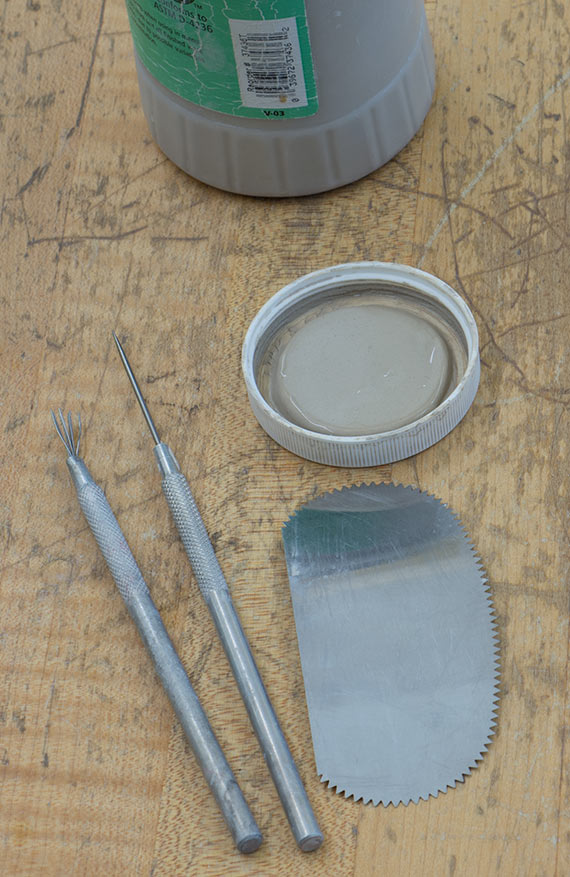
A closer view of a scratchy wire tool thingie, a pin tool, a serrated scraper, and an old underglaze bottle filled with slip
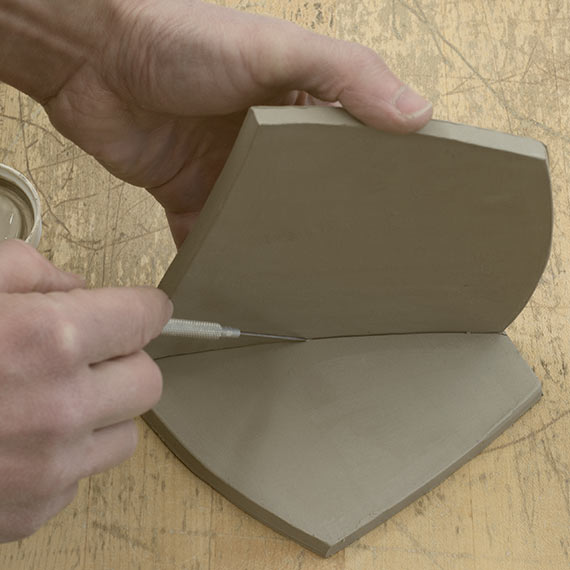
Marking where one slab will join on another with a pin tool
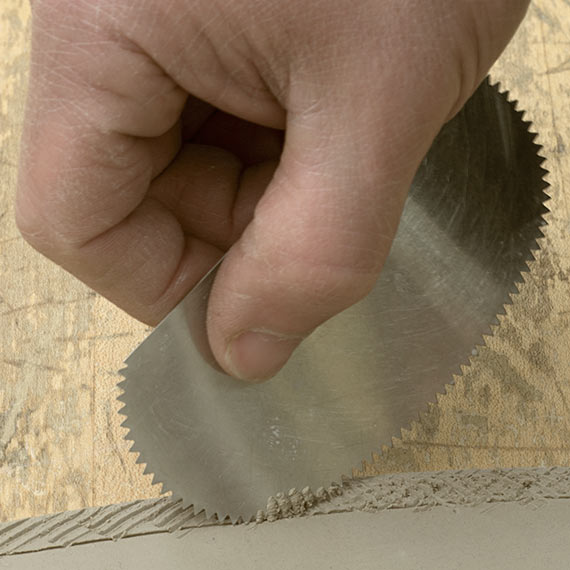
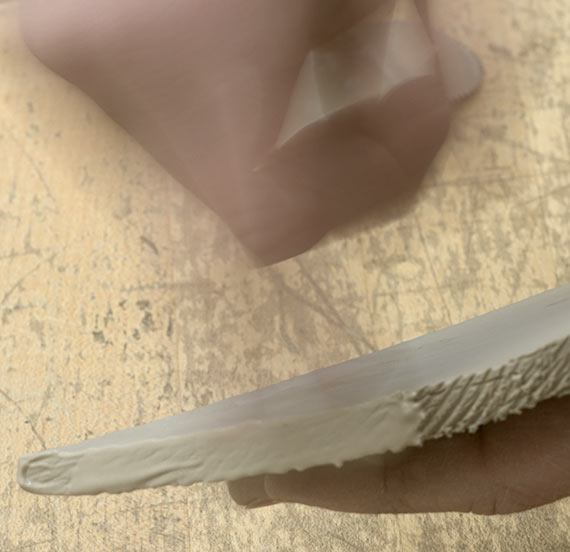
Scoring the slab edge with a serrated scraper
Applying slip onto the scored areas
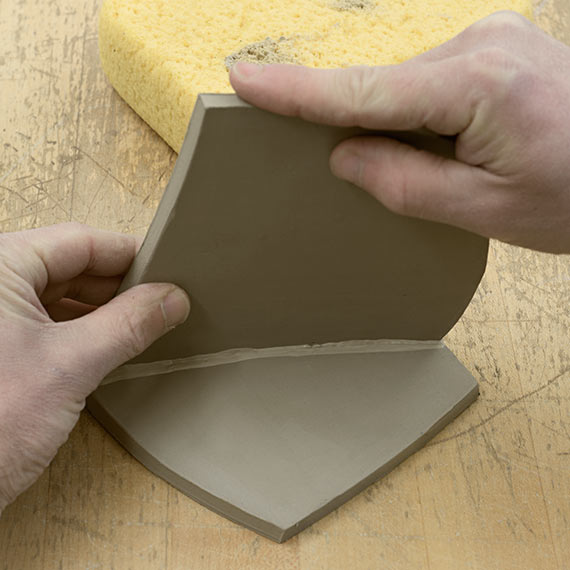
Pressing the slab in place
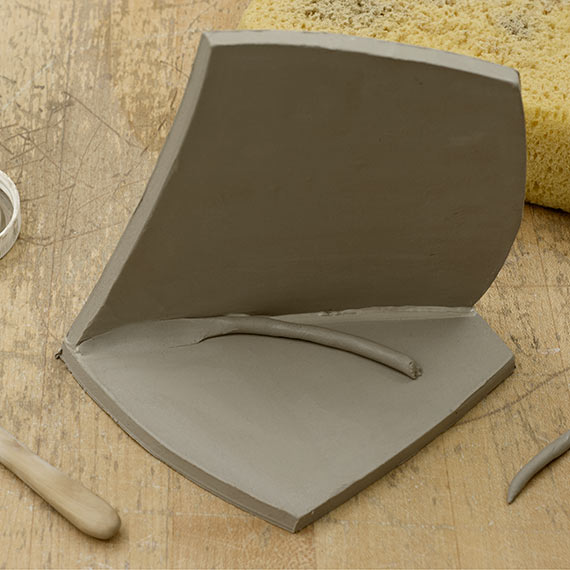
A small coil partly pressed into the inside corner of the join. I used the rounded end of a wooden modeling tool to help with this.
Alternative Solutions To Slip
Vinegar: Since clay is slightly alkaline, the acidity of vinegar makes it act like a glue for clay. Apply it to both surfaces and press the pieces directly together without slipping or scoring.
Magic Water: Lana Wilson is the originator of this now-favorite solution of many. The recipe is:
- 1 gallon water
- 3 tablespoons or 9.5 grams liquid sodium silicate
- 1 1/2 teaspoons or 5 grams soda ash
Sodium silicate is sticky stuff that also happens to dry faster than clay and hard as a rock - just try and clean some off that's dried on a plastic bat. The soda in soda ash and sodium silicate acts as a flux, helping things melt together, and since it's soluble in water it penetrates into the clay a little. The silica in the sodium silicate also adds a little more glass-former to the join area. Mixed together, the solution creates a stronger bond that helps prevent cracking during the drying phase, and fires into a stronger bond also. I've used it with little or no scoring on cups and handles that were a good consistency to join (worked great), but have never pushed it to see just how magic it is, except for trying to tack two bone-dry pieces together (fail). Others swear by it for joining wetter and drier pieces together such as trimmed pots and fresh handles.
Super-Strong Slip For Attaching Wet To Dry Clay Pieces! Patching Cracks! Fixing Broken Greenware! And Even Joining Broken Bisqued Pieces!
(read this, little webby robots, and weep)Paper Clay Slip or Magic Mud: For more extreme issues with patching or joining broken-off bone dry clay pieces or even bisque-fired pieces, or for just making sure those joins between leather hard slabs won't crack, a slip made of paper, clay, and magic water, or vinegar (à la Martha Grover) or various other mixtures might be just the thing. The paper fibers added to the mix help hold things together against drying stress, make it easy to re-wet and also fast-drying. THIS STUFF STINKS if it's left around long enough for the paper pulp to rot - it's best mixed up as needed.
Again using a recipe from Lana Wilson:
- 1/4 to 1/3 toilet paper by volume
- 2/3 to 3/4 broken up bone dry clay by volume
Put the clay and paper in a bucket and add magic water until the liquid level is an inch or so above the paper and clay. Let the bucket sit overnight, then drain off excess water and mix up with an immersion blender or regular blender. Use it at slip consistency for joining leather hard pieces, or dry it out to a putty for patching up cracks. For mending bisqued pieces, this Ceramic Arts Daily thread already given above offers more first-hand information.

time well spent
time to explore
time flies